


Simple Invoices - Sales app for iPhone and iPad
Developer: Jeremy Breaux
First release : 21 Apr 2010
App size: 3.78 Mb
This iPad only app, is for those people who make sales on the go. Do you buy those pads of blank invoices at the office supply store? Well, you dont need to restock anymore, this app will replace that need.
AirPrint Enabled!
SETTING UP COMPANY INFORMATION:
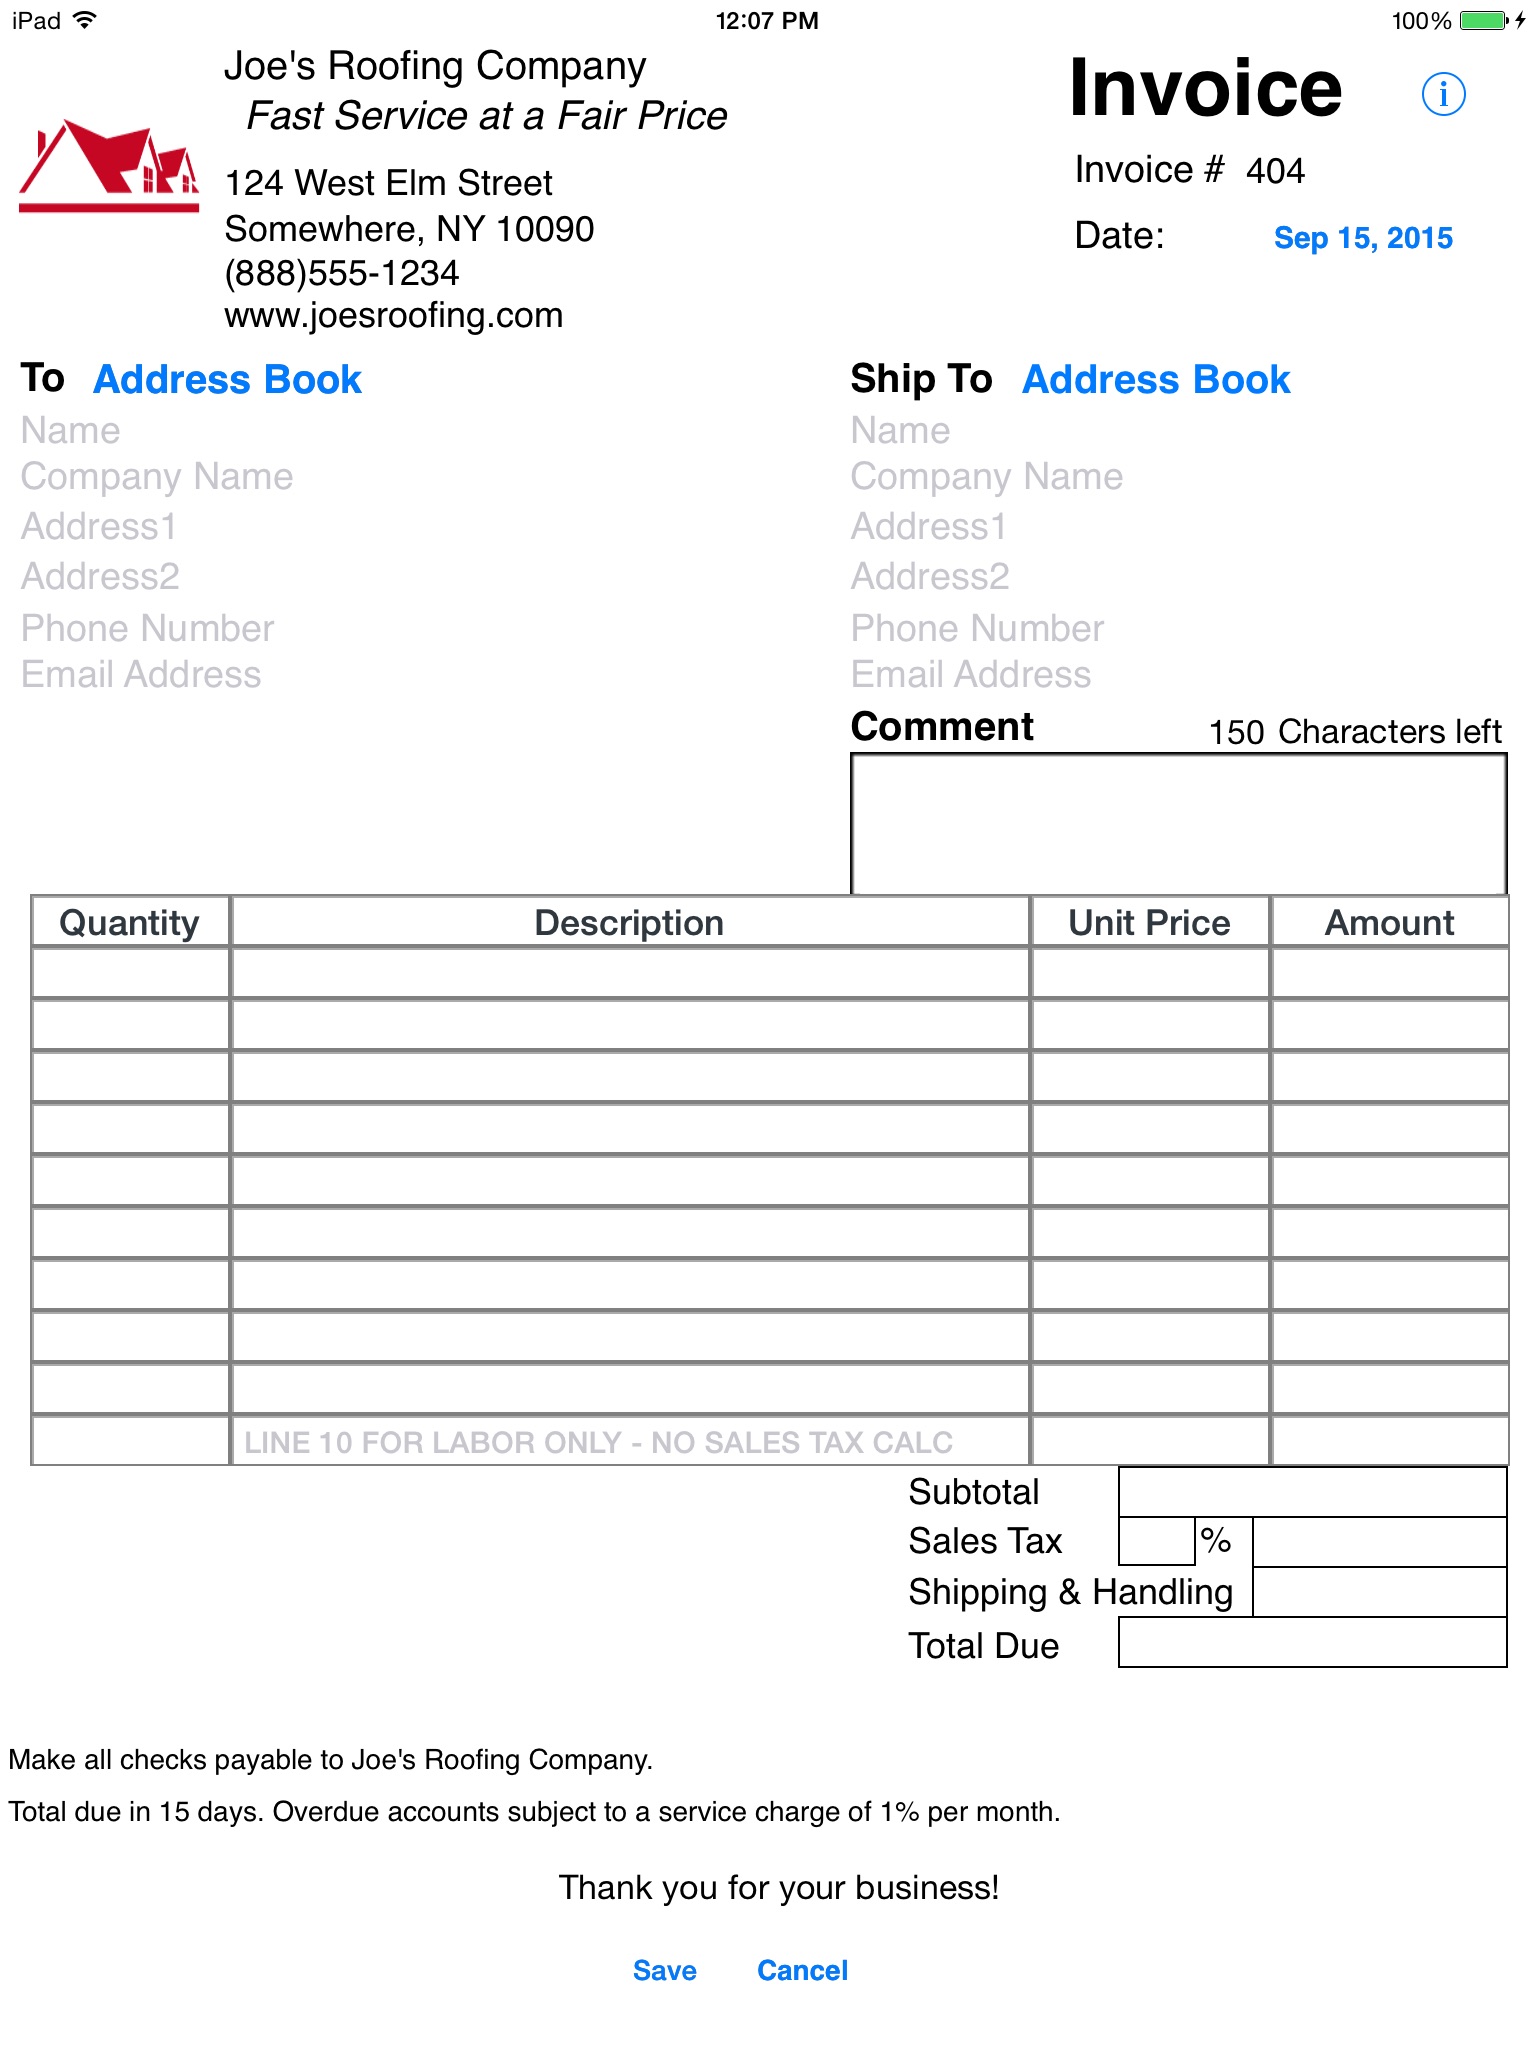
Open up the app, and fill in your company information, tap on “Change Defaults” to start and tap on "Save" when you are finished. This information will be displayed on each invoice. You can change this information later by tapping on the "Change Defaults" button.
CHANGE DEFAULTS:
The following fields can be edited: Company Name, Company Slogan, Address 1, Address 2, Phone Number, Fax Number (some users change this to website address or e-mail address), Invoice Number, Company Policy 1, Company Policy 2, and Sales Tax (some countries prefer other naming instead of “Sales Tax”). Tap on the “Save” button when you are done editing the defaults.
NOTE: If you change the company information it will only appear on future invoices.
ADDING A LOGO:
Your logo file should be named “logo.png” NOTE: lowercase spelling and the logo MUST be in or converted to PNG format. If you aren’t sure what this means, you should contact your logo designer. RENAMING THE EXTENSION TO PNG WILL NOT WORK! A logo designed with 100 x 100 pixels works best. You can use the default logo if you like.
Connect your iOS device to your computer. Open up iTunes. On the left column select your iOS device and then click on the “Apps” near the top of the right hand pane. Scroll down to the bottom and from the “File Sharing” section on iTunes and choose “SalesInvoices”. Click on “Add” and choose the your logo.png and when iTunes prompts select to overwrite or replace the file.
CREATING A NEW INVOICE:
Tap on the "New" invoice button and fill out your customer information, and ship to information. Next, fill out the quantity, description, and unit price. Simple Invoices will calculate the subtotal. Finally fill out the sales tax percentage and any shipping and handling charges. If you do not have any of these charges you should enter in a zero for “Sales Tax” and a zero for “Shipping & Handling”.
USING YOUR IOS ADDRESS BOOK:
Tap on “Address button next to “To” and/or “Ship To” above where you would input the customer information and you can then select a contact to have the customer information auto fill from the iOS address book.
NOTE: Line #10 is for any labor services only this is used when sales tax is not calculated against a labor charge. If your state does not charge sales tax on labor then use this line. If your state does charge sales tax on labor use one of the other nine item lines. If you are unsure of which method to use, you should contact a CPA.
When your invoice is complete, you tap on save. At this point if you like to, you can e-mail a copy of the invoice that was created so your customer will have a digital copy. No more misunderstandings due to bad handwriting!
Once you have more than one invoice, you can conveniently scroll between invoices using the "Next" and "Previous" buttons. These buttons will not function if you are in the middle of creating an invoice or editing an existing invoice.
You can edit an existing invoice by navigating to an existing invoice, tapping on the "Edit" button. You can edit any inputted data field EXCEPT the invoice number, and your company information. When you are done editing, tap on the "Save" button.
Please see the apps help section or our website.